Author Archives: Wavosaur

I want to see aliasing

When you sample / digitalize a sound, you must have in mind the Nyquist–Shannon sampling theorem : the max frequency of the signal you want to record has to be no greater than half the sampling rate (samples per second).
And waht happens if you have frequencies greater than samplerate / 2 ? ==> aliasing
Frequencies above the samplerate/2 limit are aliased : undesired frequency appears at (sampling rater  – signal frequency)

example :
sampling rate Fs = 44100 Hz
signal frequency = 32000 Hz
signal frequency is greater than half the sampling rate  :  32000 Hz > 22050 Hz
aliased frequency = 44100 Hz – 32000 Hz = 12100 Hz


Let’s see it in Wavosaur

1) Launch Wavosaur

2) go to menu File -> New and create a 16 bits / 44100 Hz / stereo / 4 seconds duration file

3) go to menu Tools -> Synthesis -> Frequency sweep -> Linear

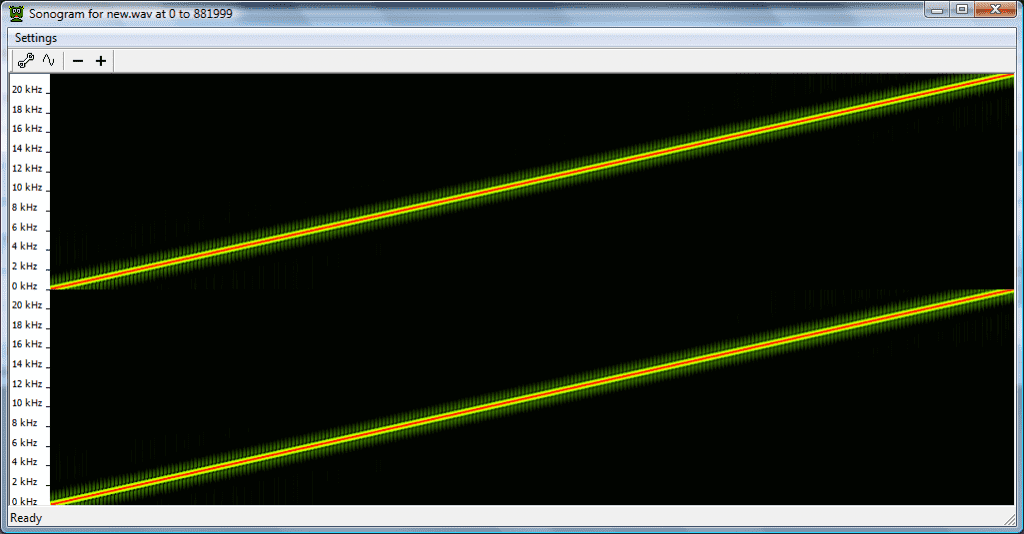
4) press “g” on your keyboard to show the sonogram, it should look like this :

sonogram @ 44100

sonogram @ 44100

5) now go to menu Process -> Resample  : enter 22050 Hz and uncheck all options : this will resample the signal @ 22050 Hz without any filtering

6) press “g” on your keyboard to show the sonogram : now all frequencies above 22050 / 2 are aliased !!
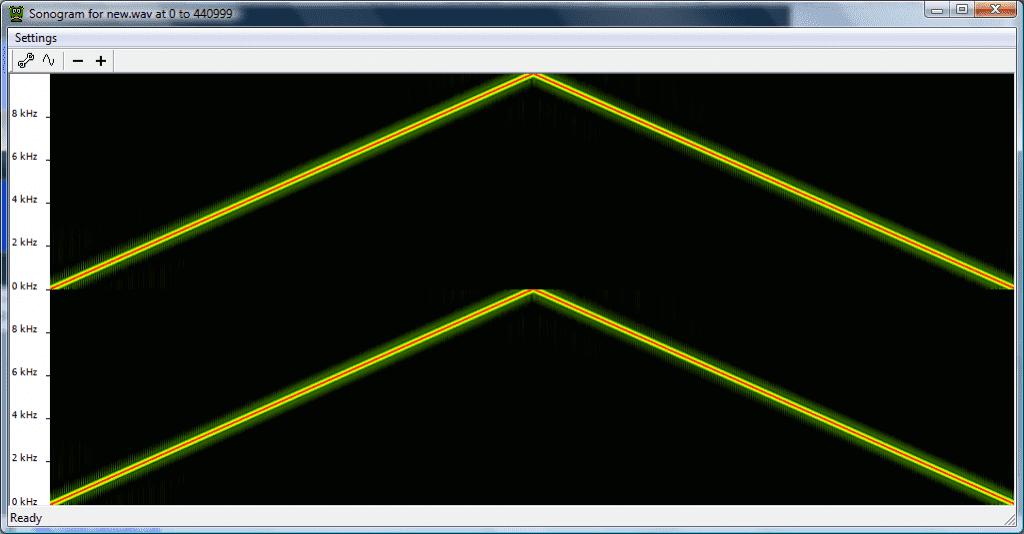
sonogram after resampling @ 22050 Hz

sonogram after resampling @ 22050 Hz


The 5 best free VST reverb

More music, less talk :

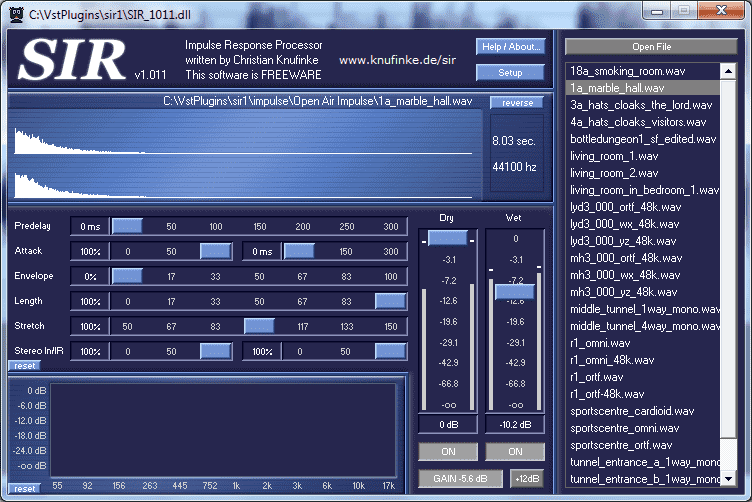
1. Knufinke SIR1 reverb plugin

SIR 1 Reverb VST plugin

SIR 1 Reverb VST plugin

More info and free download @ http://www.knufinke.de/sir/sir1.php

The well known free convolution VST reverb. Convolution reverb is a processing plugin that need an impulse response file. Impulse response is the response of a dynamic system when this system is feeded with an impulse. This gives (an approximation of) the transfer function of the system, the system can be a reverb unit, an open space, a room , etc..

The signal we send to the plugin is convolved with the transfer function of the system : the output is “like if we sent this signal in the modelized system)


The SIR1 reverb comes with two impulse response example, but of course you’ll need more than two impulse response files to cover a large variety of reverb (plate, spring reverb, cathedral, stadium, natural spaces, theater, small room, big room, etc..)

Magic of the internet ! you can find impulse response files ! and for free
Some nice free Impulse Response IR files can be found there :

http://www.openairlib.net/auralizationdb
http://www.samplicity.com/bricasti-m7-impulse-responses/
http://rhythminmind.net/STN/?page_id=4188
http://www.grgr.de/IR/files/

Continue reading

How to get the big FM radio sound (with free plugin !)

How to get the radio FM broadcast processing ?

loud & proud

loud & proud

You have music that you want to broadcast, you have set up a web radio, and now you need this “FM radio sound” : loud, clear and powerful.


You can set up a chain of effects to try to achieve this FM radio sound : multiband compressor (s), equalizer, enhancer… Or you can try this “all in one” FREE plugin, intended for FM broadcasting :
Continue reading

Remove vocals from songs (part 1)

Voice removal is one of the most demanded feature, a request that often appears on our forum. Every now and then, there’s a user that want to remove the vocals from his songs !

Elvis Has Left The Building

Elvis Has Left The Building

It’s a dream for karaoke fan, but in the reality, this is (nearly) impossible to remove one part of a song (without making several damages to the song), here’s some explanations and good tips : http://www.wavosaur.com/forum/voice-removal-t1211.html

But there are exceptions ! nothing is lost.


A very simple and fast technique for removing voice from a song is Center Channel Extraction. We can call it “center material removal”, or “mono removal”, in Wavosaur it’s called “vocal remover” !!

remove ‘center material’

When dealing with stereo files, it’s very easy to remove all the mono sounds : Continue reading

Robot voice in Wavosaur : robotize your voice (only with native effects)

Adding a metalic feeling to any voice to make it sound like a robot is easy.
Of course if you want the extra funkyness you can use a vocoder plugin in Wavosaur
But to change your voice into a nice robot (not a bad robot, this will be for a next tutorial), just 2 or 3 clicks are necessary :

For simpler & faster results, you can use amplitude modulation

How to sound like a robot ?

1) launch Wavosaur and load a voice sample

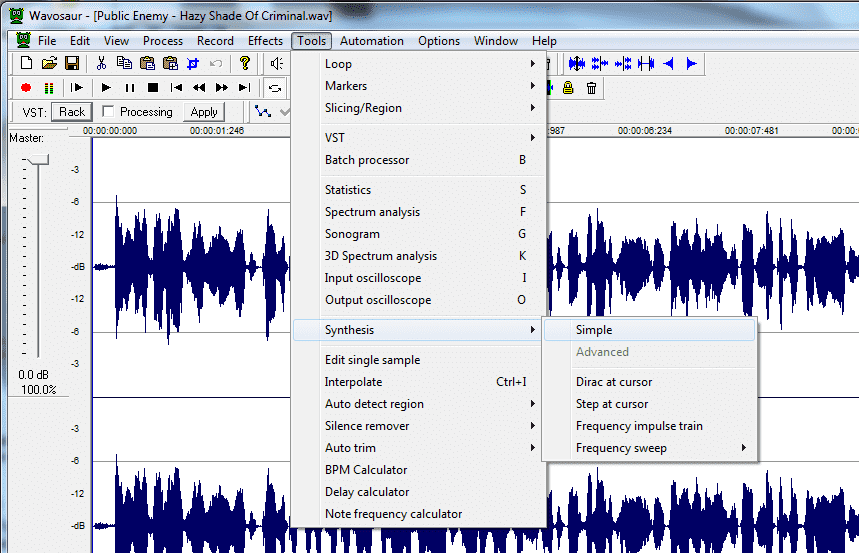
2) go to Menu Tools -> Synthesis -> Simple

Synthesis tool menu

Synthesis tool menu

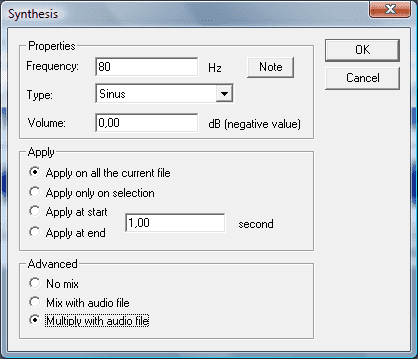
3) now use these values for the parameters :

– Frequency : 75 Hz
– Type : Sinus
– Volume : 0 dB
– Apply : “Apply on all current file” OR “Apply only on selection” if you just want to robotize a selection you made on your file
– Advanced : Multiply with audio file  – this is the most important! this is the Amplitude modulation! –

Synthesis tool

Synthesis tool

4) click the “OK” button

Now you should have results like this :


extra bonus more plus (gating)  :

Of course you can try other values for the frequency, if you select low frequency values (under 20 Hz), you start to have a tremolo effect, or gate effect if you change the waveform to abs square
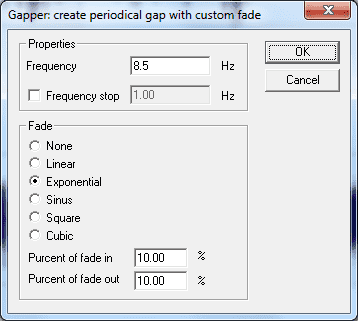
but the synthesis tool is not well suited for gate effect, for that, there is the gapper effect

go to Menu Effect -> Gapper

Gate me !

Gate me !

Now you can select smoother waveforms for gating your file (and apply fade in/out to prevent click noises)


.

Slice me tender : chop your breakbeats !

Sometimes you need to slice your breakbeat samples into small pieces, with just the hits, then you can import the parts into any sampler / synth / etc to re arrange, change speed, apply effect individually, whatever you want.

This is only 2 or 3 click in Wavosaur !

All the features you need are already in Wavosaur : auto-slice and export all regions.


How to auto slice a breakbeat / drum loop in Wavosaur ?

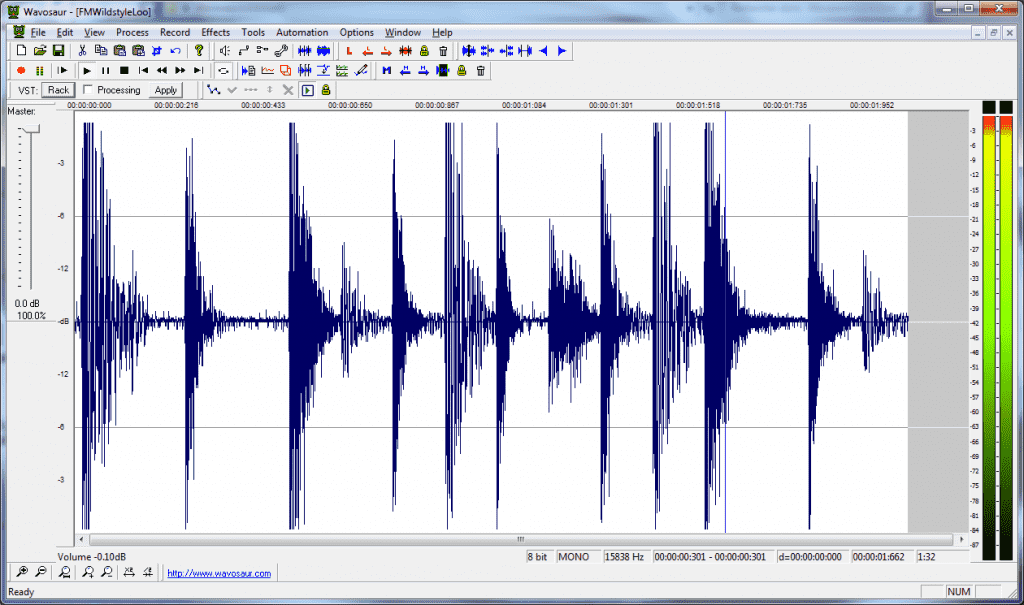
1) launch Wavosaur and load a funky breakbeat, or groovy drum loop


breakbeat slicing

breakbeat slicing


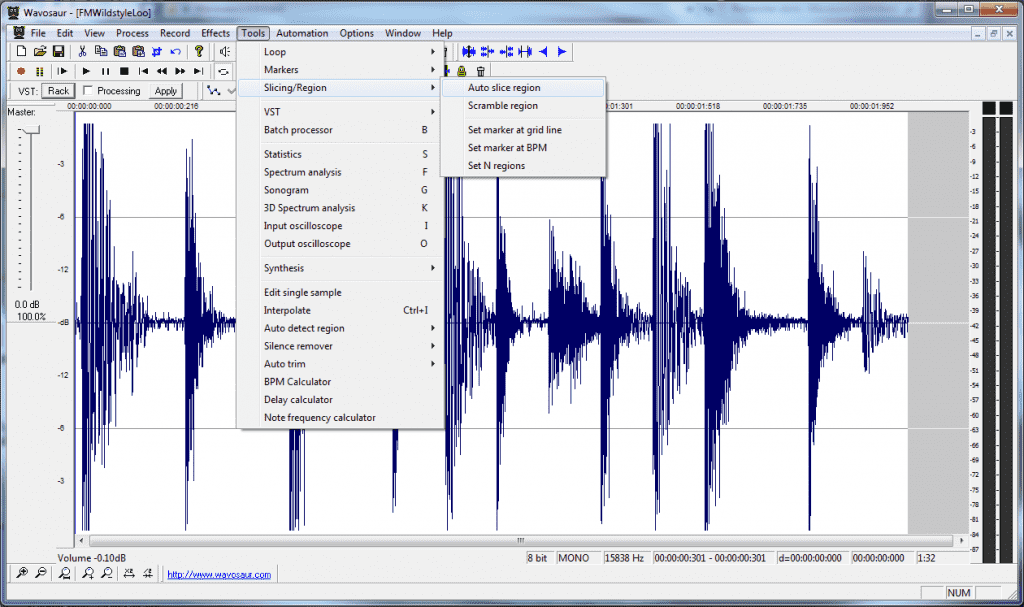
2) Select Menu Tools -> Slicing/Region -> Auto slice region

auto slice feature

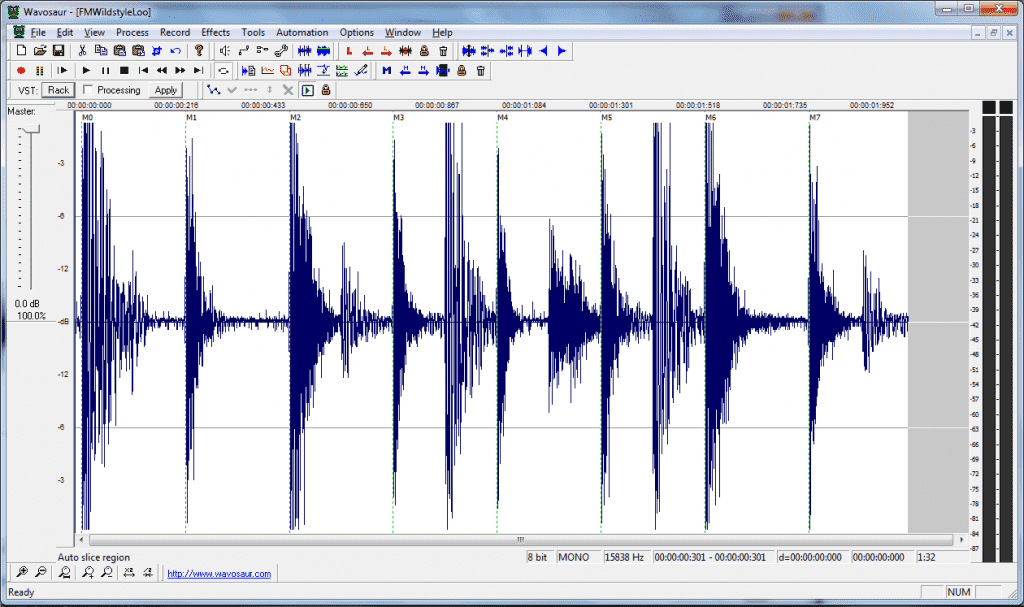
slice me in the morning

breakbeat-slice3

as you can see, you have now 7 markers automatically inserted, determining 8 regions.
you can manually add markers if you want to create more /  smaller regions.


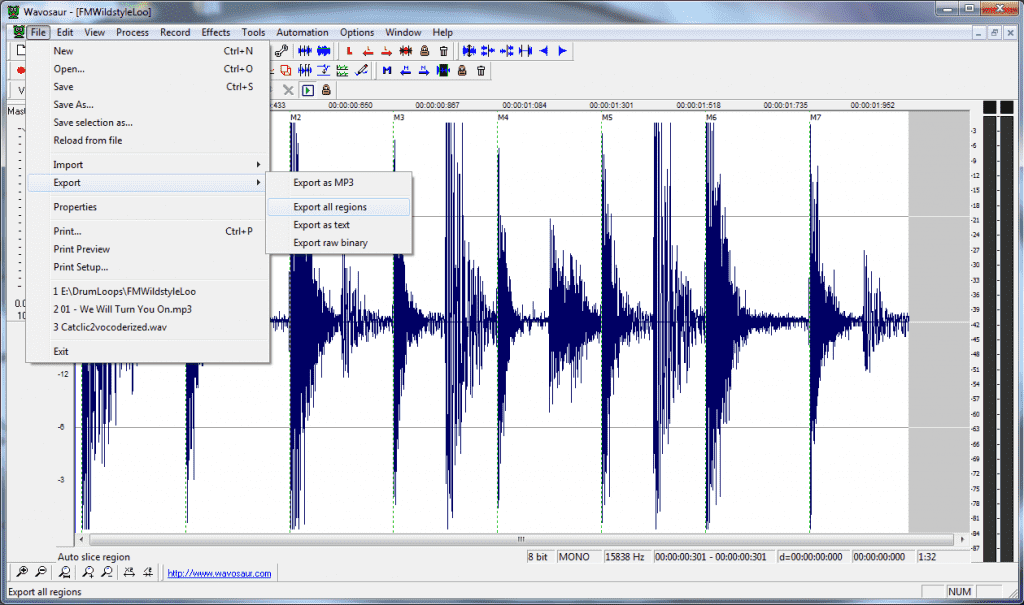
3) now go to Menu File -> Export -> Export all regions

exporting all region into multiples samples

exporting all regions into multiples samples

This will save 8 samples, with the name you choose and a suffix : breakbeat-sample_M000 to breakbeat-sample_M008


4) bonus track :

in the Slicing / Region submenu you have another funky feature : “Scrambling regions
once you have defined region (automatically with auto slice or manually), the scrambling feature will change the position of the region, in a random way.

now let’s add some pitch shifting (Menu Process -> Pitch Shift -> Simple) and … INSTANT JUNGLE !!

Original drum loop :


Auto slice + scramble region + pitch shift :


Auto slice + scramble region + pitch shift + a little reverse on some snare

Vocoder in Wavosaur, with freeware VST/DX plugins

You want a robot voice, a daft-punk-funky-groovy voice effect, you want it you need it.
you need a vocoder ! For quick and dirty vocoderization, you can set up Wavosaur with some cool freeware plugins and get the job done.

voice without vocoder (not funky) :

voice with the vocoder !


To keep it simple, we’ll take free vocoder plugin with a built-in synth for the carrier. The two vocoder plugins listed here : http://www.wavosaur.com/vst/vocoder-plugins.php are freeware and work nice with Wavosaur :

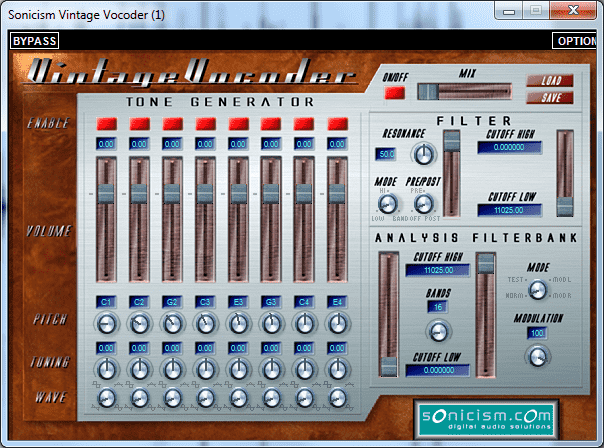
Sonicism Vintage Vocoder DX

Free DX vocoder

Free DX vocoder

more info and download here : http://sourceforge.net/projects/vvocoder/files/Vintage%20Vocoder%20DXi/
note that the plugin is in DirectX format!  but no problem, you can use it in Wavosaur, we’ll give all the process in this post.

Continue reading